Network Etudes pic

Networking Etudes : # : Network Etudes


Home Network Diagram


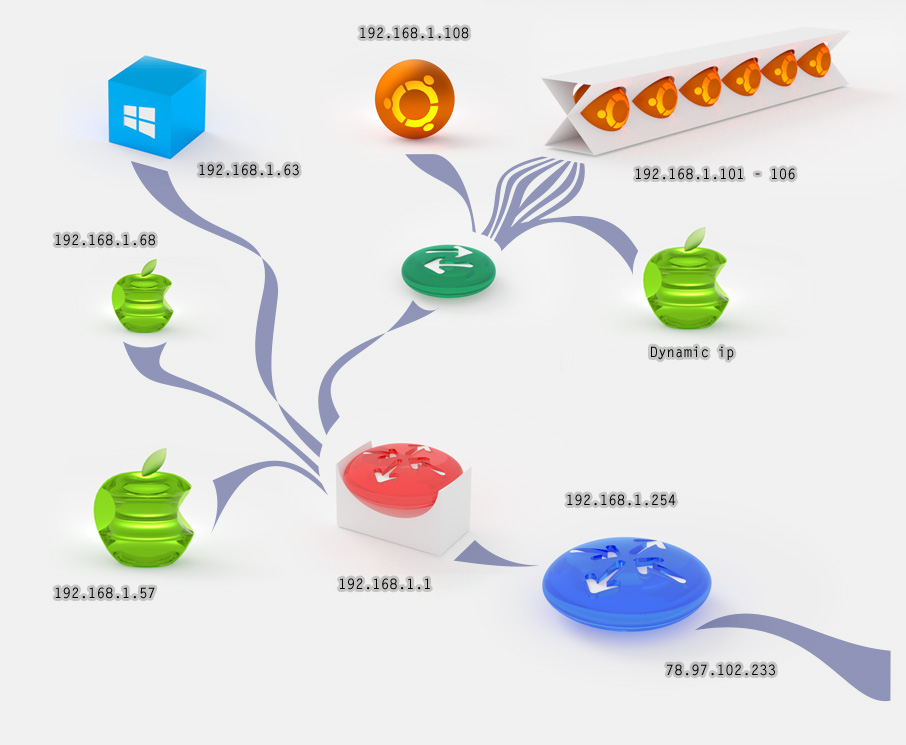
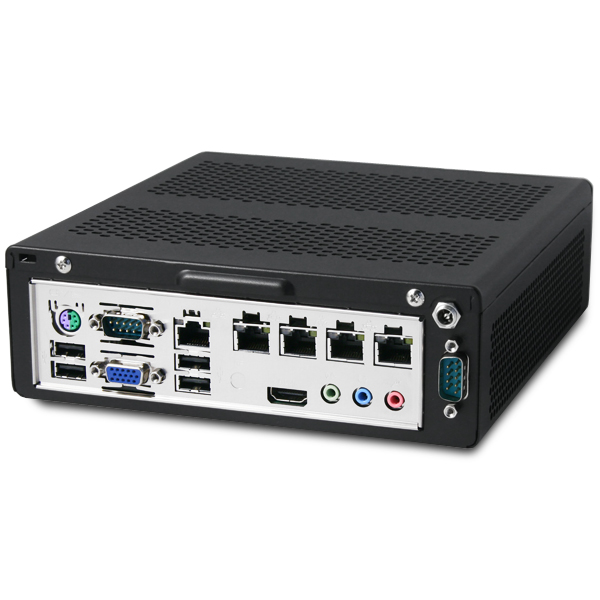
  • Red Pill is called 'Scripting Box' - home-grown appliance.
  • The primary purpose of 'Scripting Box' is to analyze all the outbound traffic.
  • All the inbound traffic is stopped by the firewall already, but there are all kinds of spyware, phishing, social engineering attacks (targeting kids, primarily) - 'Scripting Box' is there to stop it.
  • Well, that and also it's good to have a neat way to handle Level 2 / Level 3 layers for the entire home (datacenter) network. Right?

December 26. 2014

Background


Click to zoom in

Hardware Specs pic

Networking Etudes : #2 : Hardware Specs

Scripting Box Hardware


  • Jetway NF9I-2550 Mini-ITX Motherboard (Long-Life Embedded Class Industrial Motherboard) with 1 Gigabit LAN
  • Jetway ADE4INLAN Daughterboard with 4 Gigabit LAN ports
  • 4GB DDR3-1333MHz SODIMM
  • HDD
  • Morex 557 Mini-ITX Enclosure
  • 4x USB 2.0 | VGA | HDMI

We use it headless (without monitor), but it still has VGA and HDMI ports just in case. Note: Ubuntu might have problems with graphics and show a black screen right after the installation, so you should do the network configuration during the installation, so you'd have access to it through ssh later. Then you can blacklist gma500-gfx and even set up a text mode.

Morex 557 Mini-ITX Enclosure can be mounted on the wall, but in that case HDD would be on its side. The enclosure gets slightly warmer in there (comparing to an open frame): + additional 17C on average. Still pretty decent.

No fans means no noise.


December 26. 2014

Background


Click to zoom in

Base Software Specs pic

Networking Etudes : #3 : Base Software Specs

Scripting Box Base Software


Basic OS Install

In year 2005 I had to build my own Debian distro to boot Soekris from compact flash. Progress is good. Life is much simpler now, in year 2014.

  • Download the Ubuntu server installation onto a USB drive using Universal-USB-Installer.
  • Install on the box by following the installation steps. Could be FreeBSD as well.

Basic Networking Setup

  • Ip forwarding: edit /etc/sysctl.conf, uncomment this line in order to enable IP forwarding.
    #net.ipv4.ip_forward=1
    
  • Configure the bridge interface as follows:
    iface br0 inet static
            address 192.168.1.1
            network 192.168.1.0
            netmask 255.255.255.0
            broadcast 192.168.1.255
            gateway 192.168.1.254
            bridge-ports  p2p1 etc, ports separated by spaces.
    
  • DHCP setup. Get the server, then edit /etc/dhcp/dhcpd.conf:
    apt-get install dhcp3-server 
    
  • Keep this to prevent DNS updating when a lease is confirmed.
    ddns-update-style none;
    
  • Options for domain name and DNS server. If you want global options place them outside subnet declarations,otherwise inside.
    option domain-name "gateway.2wire.net";
    option domain-name-servers 192.168.1.254;
    
  • Lease times.
    default-lease-time 600;
    max-lease-time 7200;
    
  • If this is the official DHCP server for the network, have this.
    authoritative;
    
  • Subnet declaration format:
    subnet ip type netmask (netmask){
        range  ##range of ip #'s;
        option routers  ##default router(s)
    }
    
    Example: The net mask allows up to 30 ip's from that subnet . The range defines what range of values to use. The routers option defines the default gateways.
    subnet 192.168.1.0 netmask 255.255.255.224 {
        range 192.168.1.10 192.168.1.20;
        option routers 192.168.1.254;
    }
    
  • To activate the DHCP server, run
    /etc/init.d/dhcp-server start
    
  • We have wireless disabled in our router/modem and only use AirPort for IPad/Mac. As a result - all the network traffic in the home/datacenter goes throught the 'Scripting Box' (and then to the router/modem).

December 26. 2014

Background